Saturday, March 28, 2009

New Villagers

Hola todos,

I´ve been quite busy with my school lately(that´s a good excuse, for being a lazy blogger), but I´m glad that I´ve knitted few new Villagers. Earlier this spring I bought a pattern from fuzzymitten.com and the result was supposed to be a cat, but surprisingly he is now a mouse.
May I introduce you HENRY, the soccer player:

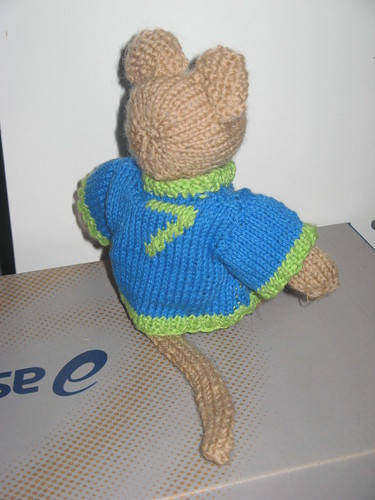
I also made him the t-shirt and added number seven on it. The pattern for the shirt is from a book called: The Knitted Teddy Bear.

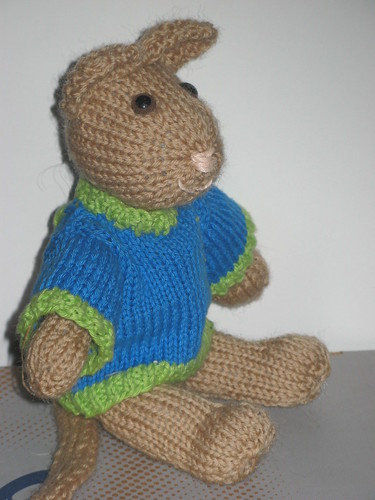
And I bought an egg cosy pattern from Little Cotton Rabbits about one and half weeks ago. She is almost perfect, but I think I have a problem with the head. Compared to the pictures of the patttern, the heaf of my bunny is much smaller even I used maybe 8 ply yarn for the head instead of 5ply.

Kiirettä on pitänyt koulun kanssa (koeviikko ja ylioppilaskirjotukset peräkkäisinä viikkoina on rankkaa), mutta olen sentään saanut aikaiseks muutaman uuden kyläläisen. Ensimmäinen on Henry Hiiri, josta aluksi ohjeen mukaan piti tulla kissa, mutta jostain syystä kävi niin, että hän halusikin olla hiiri. Sitten lisäsin vielä Henrylle paidan, johon lisäsin numeron 7. Hän on niitä hiiriä, jotka rakastaa pallon perässä ravaamista.
Sitten ostin Little Cotton Rabittsiltä ohjeen munansuojukseen ja neuloin nopeasti viime sunnuntaina hänet valmiiksi. Pupu ohje on mun mielestä aivan mahtava, mutta mun pupulle tuli ihan sairaan pieni pää, vaikka käytin paljon paksumpaa lankaa päähän, mitä ohjeessa neuvottiin.
Mulla on vielä matikan koe jäljellä, mutta sen jälkeen ajattelin neuloa muutaman pupun lisää ja virkata lisää amigurumeja.

Best wishes
Terveisin
-Minttusuklaa-

P.s. Please leave a comment!

Monday, March 9, 2009

Scrapbooking

Hi all,

me and my little sisters (I have 3 of them) found a new hobby couple of weeks ago. We decided to start scrabooking. I had one super boring folder lying in my room (actually under my table) and I had bought scrapbook papers (70% sale) earlier. So we decided to make the folder prettier. I took my scrapbook papers to upstairs to my little sister´s room and we started to glue, cut and put all piecies together and this is what we got.
I started from this:
And this is what I have now:

Mä ja mun pikkusiskot (mulla on niitä 3) alotettiin skräppääminen muutama viikko sitten. Mä olin saanut aivan SUPER tylsän kansion jostain ja se pyöriskeli ympäri mun huonetta. Mä olin muutamaa viikkoo aikasemmin ostanut Tiimarin alennusmyynnistä skräppäyspapereita ja niinpä me päätettiin päällystää kansio. Yhtenä päivänä mä sitten kannoin kaikki kamat pikkusiskon huoneseen ja me levitettiin ne lattialle ja alotettiin leikkaamaan ja liimaamaan. Mun täytyy sanoa, että askarteleminen on hirveen hauskaa, silloin kun siihen pystyy kunnolla paneutumaan.

Hugs!
Skräppäys terveisin:
-Minttusuklaa-

Monday, March 2, 2009

*Little Baby* (free pattern)


Hi!
I finally got my pattern ready! It´s a simple and VERY EASY pattern for a baby girl/boy. I designed pattern for a baby, because there wasn´t any good patterns online for free. And I decided to make one. The pattern isn´t tested so please contact me if you find any errors. I hope I see many little babies in the future.

Lopultakin sain uuden ohjeen valmiiks. Se on superhelppo vauvan ohje. Mua on pitkään harmittanut ettei mistään oo löytynyt ilmaista simppelia ohjetta vauvalle, joten mä päätin suunnitella sen sitten itse. Ohjetta ei oo testattu, joten ilmotelkaa, jos löytyy vikoja!

And finally the pattern:
You need:
DK yarn in skin colour and in white.
Needles size 2.5mm
Stuffing
Tapestry needle

Legs:
Cast on 10sts with skin colour.P1 row
Next row: K1, *m1, k1*, repeat to the end. P1 row
Next row: K4, *m1, k3* repeat 5 times.
St-st 5 rows
Next row: k8, skpo twice, k2tog twice, k8.
Next row: p6, p2tog 4 times, p6.
Next row: k7, k2 tog, k7.
St-st 17 rows.
Cast off

Body and head:
Cast 26 sts with skin colours. P1 row
Next row: K1, *m1,k5*, repeat to the end. P1 row.
Next row: K1, *m1, k9* repeat to the end.
St-st 13 rows.
Next row: K6, k2tog 5 times, k9, k2tog 5 times, k6. P1 row
Next row: K1, *m1, k2* repeat to the end.
St-st 17 rows.
Next row: K1, k2tog to end. P1 row.
Next row: K1, k2tog to end.
Break off the yarn and pull yarn through the stitches that left to the needle.Sew the back and stuff the body. If you use safety eyes for the doll, you have to put them before stuffing. Now you can sew the feet to the lower body. To shape the neck, use yarn to mach the head and gather round between the increasing and decreasing round. Pull up the gather very thightly and knot ends of the yarn. Sew yarn ends into the neck.

Arms (make 2):
Cast on 12sts. Beg with P row st-st 19rows.
Next row: K2tog every st.
Break off the yarn and pull yarn through the stitches that left to the needle. Sew the seam of the arms and stuff. Sew the arms to the body, below the shoulders.Embroider the face and embroider a bit of hair to the top of the head.

Diapers:
Cast on 22sts with white. G-st 2 rows.Continue st-st and 1st at each end of next and every following row until 2sts remain.
St-st 2 rows.
Inc 1st at each end of next and every following row until there are 22sts.
G-st 2 rows and then cast off. Oversew the 2 g-st rows at the each end.

Dreass the baby and you little doll is ready!